Ah, the love for smartphones. No one is ignorant when it comes to how useful these gadgets are and how brilliantly they have incorporated themselves into our daily lives. One can barely imagine leaving their home without these smart gadgets and I would only imagine all hell breaking loose if you are not reachable, given you forgot carrying it with you. But hey, you know that! Right? Let us head straight to the purpose of this article.
There are only a couple of smartphones that are out in the market right now that provide you with the ability to slide out the battery from them without requiring boatloads of handy work. Most of the new smartphones that are currently in the market have got built-in batteries. You may now ask yourself, why do almost all the latest smartphones have built-in batteries? Well for a variety of reasons. To name a few:
- More premium design
- Water-resistance
- More room for other stuff
With the way the smartphone technology is getting upgraded day in day out, we would not be able to see the removable batteries being used in our shiny new mobile phones. It would be wrong to call this sophisticated gadget like a mobile phone since these are our handy portable laptops; least to say.
So to prolong the batteries of our shiny new smartphones, it is best off to treat them with tender love and care right off the bat. Trust me, it is way difficult to replace your Lithium-Ion batteries than it is to treat them with some TLC. Since a majority of the smartphones do not provide the end-user with easy access to their batteries, it is advisable to follow the tips & tricks jotted down in the article below to ensure your battery remains top-notch and performs flawlessly.
Majority of the new smartphones including the iPhones and many flagship Android smartphones have got built-in batteries and getting a replacement on one of these is not only a hefty job but also heavy on the pocket. Along with it, there are a plethora of environmental hazards that tag along with the manufacturing of the batteries, let alone using them. Smartphones batteries do indeed pose a significant threat to the environment and frankly extending the life of each battery that comes pre-installed into our smartphones is the way forward.
Head over to my article on which particular smartphone is best for smart home automation. I have covered all the details relevant to why a particular smartphone platform is beneficial and the features it provides in your smart home ecosystem.
I will be going through traditional ways that are both tested and tried to extend the battery life of your vanilla smartphones’. This is especially applicable on smartphones that have got replaceable battery slots and the batteries can easily be removed just by sliding the back cover from the smartphone.
If you are the owner of a RING Doorbell, then head to my article where I have discussed steps you can take to maximize the efficiency of a RING Doorbell.
Table of Contents
How to Restore Cell Phone Battery Life

There are a couple of ways through which you can restore the battery life of your smartphone. Whether your phone’s battery has died out completely, is not working correctly or perhaps whatever the scenario is. You can follow the given 3 methods below to restore life in your mobile phone batteries.
Method 1
Making Sure the Battery Compartment Is Clean
Remove the battery from the mobile phone by removing the back cover on your cellphone. This is entirely not possible even on the 1st generation of Apple’s iPhones. So do not bother if you are an iPhone user.
You may also refer to your manufacturer’s manual that can easily be found online, or perhaps now is the time to get cracking on finding the box in which your mobile phone came along with and getting hold of that instructional manual from within that box.
Get hold of a clean microfiber cloth and wipe away all the dust and debris that might be present in the compartment. This step is vital to ensure that there are no external factors that are limiting the supply of power from your battery to the board on your mobile phone. Also, ensure that the microfiber cloth is clean and dry. Since a dry cloth would damage your phone and might render is unrepairable.
Once the battery compartment has been carefully wiped out. Now get hold of that battery in your hand, and wipe away all the debris and dirt from the battery itself.
Tip:
Ensure that the battery is not swollen or leaking. If so is the case, do not use this battery and recycle it by placing it in dedicated containers near your house.
Insert the fresh battery back into your phone and fire it up. This step is the baseline to ensuring that your battery remains spotless and performs well.
Method 2
Freezing the Battery in Your Smartphone
This step has been personally tested on my Samsung Galaxy S5. You are free to try this at your own accord. SmartNutter should not be held responsible in case your battery gets damaged. Well, I was able to resuscitate my cellphone’s battery this way. So it should work for you as well.
Get hold of a zip-lock bag and insert your battery in it. If that is not available, then you can even get away with wrapping your battery with paper or even a plastic film.
Your primary focus at this stage should be to ensure that battery is well wrapped and is not exposed to any water or liquid inside the freezer. Since moisture will definitely damage the battery and this is not what the purpose of this exercise is now, isn’t it?
Place the sealed envelope into your freezer.
I kept mine in the freezer for 3 days. But if you are in a rush, you can even get away with keeping it in the freezer for 12 to 24 hours.
Exposing the battery to cold temperatures allows to it get recharged, and thus allowing you to connect it into your cellphone and thus hooking it up with your regular wall-charger for it to retain the charge.
When the 3 days mark has passed, remove the battery bag from the freezer. If accidentally there is some moist observed on the battery even though you should have kept it covered, now is the best time to wipe it again using a dry & clean microfiber cloth
Remove the battery from the pouch and keep it on a solid surface (preferably wooden table) and leave it to settle down under average room temperature. Under no circumstances should you be keeping the battery under direct sunlight. Duh!
Once you have gone through the above drill, now the time has finally come to insert the battery straight into your phone after it has been kept under room temperature for 24 hours.
IMPORTANT:
DO NOT power on the phone after you have inserted the battery into your phone. First of all, get hold of your wall charger and connect it to your phone. See if it starts charging. If you can see the status of battery being charged, then leave it as it is till the battery gets completely loaded.
DO NOT switch on the phone for another 48 hours. Leave the phone on the charger for at least 48 hours before you unplug the cable. Once the 48 hours bracket has passed whilst the phone was continuously connected to the wall charger, you can then finally test if this Method has worked in your case or not.
Swiftly disconnect the cable from the cellphone, and switch on your cellphone. Voila! If your phone powers on, you are golden!
I would not say that this method would bring your battery back 100% of the time. But in most of the scenarios, you can quickly revive your dead battery using either of the 3 methods that I have mentioned in this article of mine. The freezing approach by far has resulted in excellent results for the majority of the smartphones that I owned of which the batteries gave up on me either too soon or due to a malfunction. We all need to understand that replacing battery poses both environmental risk and also has a significant impact on the environment around us.
Method 3
Jumpstarting the Battery
Alright people, get your hands on the following
- 9-V Battery
- Electrical tape (And No! Not a scotch tape)
- 2 Copper Wires
Thin electrical wires would do just fine for the point “c”. Try to get the coloured electrical wires, i.e. red and black.
CAUTION:
A word of caution here. If you do not know zilch about electrical cables and circuits, then I would suggest you do not attempt this at home and take your phone to a local mobile repair shop in the towner centre to get this done. Not knowing what you are doing around electrical components poses a significant threat to your well-being. You may end up not only hurting yourself but also the battery might explode if you connect wrong wires to it. So be wary people!
Alright, since that is out of the way!
Tape one end of the electrical wire (red wire, if you had picked up the black and red electrical wire pair) to the positive node of the battery. On a 9V battery, the SMALL POLE (small node) is the one which is the positive node of the cell. Tape the wire to the positive node using a bit from the electrical tape. Ensure that the connection is secure before you apply the tape on it.
Most of the new 9V cells have got both Positive (+) and Negative (-) labelled on the top for your ease. So that is a cue for you too.
Use the black cable and connect it firmly onto the Negative (-) terminal of the 9V cell. Make sure that you connect the wire securely before you apply the electrical tape onto it.
Now get hold of your smartphone battery and find out on the trims of the battery where the positive and negative terminals are. Both the (+) and the (-) terminals are clearly labelled on the battery’s casing as well; therefore it shouldn’t be a problem trying to identify each.
Most of the Li-Ion batteries have got more than 2 terminals. If so is the case with your smartphone’s battery, use the furthest end of the terminals to act as both the positive and the negative node. Do not use the ones in the middle.
TIP:
If all this sounds overwhelming, my best advice to you would be that you drop this idea and resort the above 2 methods. If the above 2 fail, then you may then take this battery to a local electrician and have them do it for you.
Now connect the other end of each of the cables connected to the 9V cell, to the positive and negative terminals respectively. Meaning, connect the positive wire coming from the battery to the positive socket of your cellphone battery and connect the negative cable coming from the battery to the negative outlet of the cell.
CAUTION:
Under no circumstances, you should
- Connect the cables to the opposite terminal
- Connect or touch the wires together
Tip:
Remember to use two separate cables. If you have taken the cable lying around in your home that was of no use, ensure that you slice the wires into two separate pairs.
Now, leave the cables connected to the terminals of your cellphone battery; for anywhere between 10 to 60 seconds.
The cue here is that, once the connections are made; you should immediately pull out of the cables as soon as you observe that the cellphone battery has begun getting warm. Do not risk it! As soon as you feel that the battery of the cellphone, is becoming warm; immediately pull it out of the circuit.
Now insert the battery back into your cellphone. Turn your phone on and see what is the battery level right at that moment. If you were able to start your phone with using this method, then feel free to connect the wall charger to your phone and charge it as you usually would.
Method 4
Calibrating Your Cellphone Battery
This method involves you to discharge your cellphone battery complete and letting it die out from no charge. This is extremely helpful if you notice that your phone charges rapidly but depletes in battery super-fast.
First of all, let your phone die out completely once it reaches 1% battery, naturally. Once the cellphone is completely switched off, try to power it on again to see if it does. This is to ensure that last bit of charge that is still present on the battery of your dying phone also gets used.
Now plug your phone into the wall charger that came along with your particular model. Ensure, NOT to switch on the phone after you put it on charging.
Some of the latest models have the feature to auto-switch on once you connect them in such a way. If that is the case in your particular scenario, then fret not! Just switch off the phone again and keep it on charging.
Wait until your phone is completely charged. That should ideally be displayed with a percentage remark if you are an Android user. But in the case of the famous iPhone’s, you just need to wait for about 6 hours. This is to ensure that the battery is fully charged!
Once the 6 hours mark or the 100% complete charge status is seen on your particular model, it is now time to power on the device. Ensure that you leave the charging cable connected at all times during this whole process.
Once the phone is entirely powered on, now; restart your cellphone.
Finally, when the phone comes back on. Just remove the power cable and start using your particular handset. You should now ideally see an improvement in performance and endurance. Voila!
The Key to Saving Battery Life
Below are a couple of steps you can resort to, to ensure you don’t lose on those precious moments when you need your cellphone the most.
- Turn off background data and auto-syncs.
- Keep your screen brightness low and enable the dark mode.
- If you have got very lower battery power left on your cellphone, you are better of switching off the data connection entirely till the time you can hook your device to the charger. If it is an absolute must to have data connectivity, then switch off LTE and run your cellphone on 3G or even better, 2G.
- Switch on the “Low Power Mode” function once your handset is fully charged and you know that you won’t be able to get hold of charging your handset again throughout the rest of the day.
10 Ultimate Ways to Make Your Smartphone Battery Last Longer
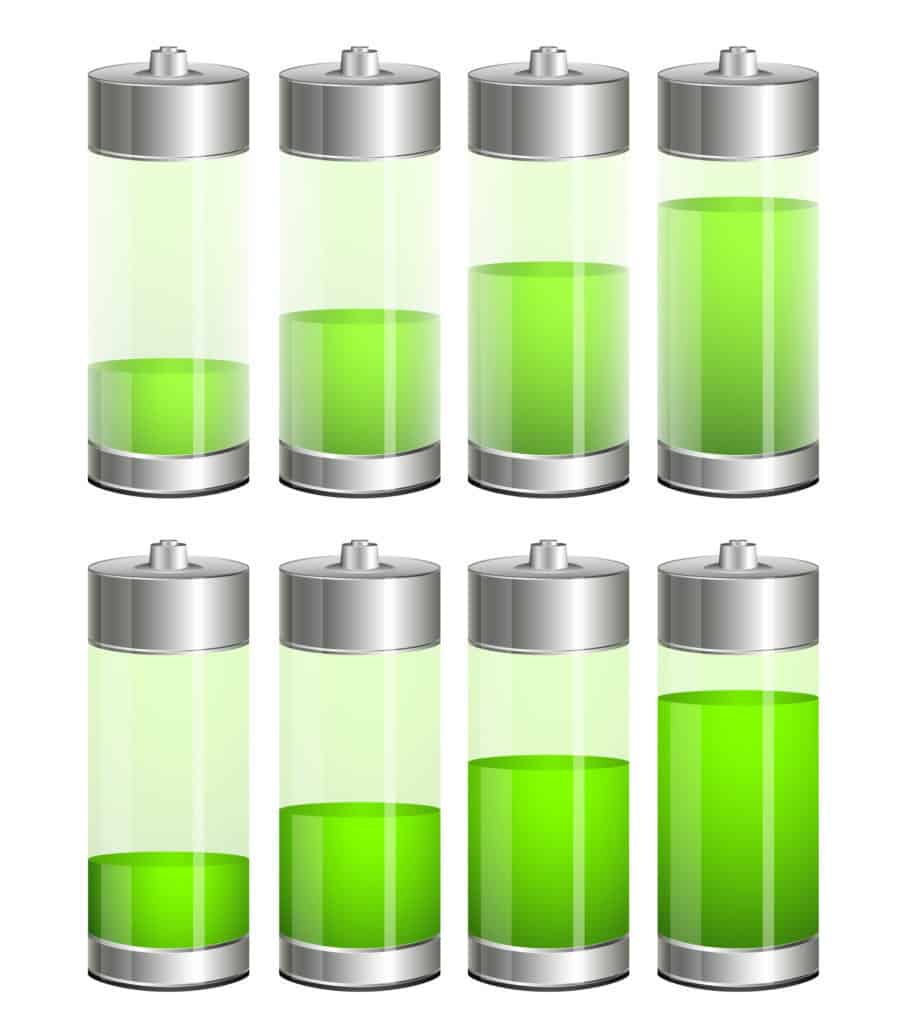
Like any other smart device you have in your arsenal, it is always better to have a preventive approach rather than reactive when it comes down to using them. You are better off following the 10 ultimate ways to preserve the battery life on your smartphone, by ensuring
1. You need to understand the reason why your smartphone’s battery degrades
Each battery has a certain number of charge cycles after which the battery loses its quality to retain and hold the charge. In very basic math, when you start using your brand new smartphone you would notice that its battery lasts longer, it has a great grip on all the apps that you install and the phone tends to last for a full day with heavy use. That is possible due to the battery’s efficiency.
A typical Lithium-ion battery comes with a 400 charge cycle. A charge cycle is a full charge and discharges from 0% to 100%. A half charge is when you change your smartphone from 50% to 100% and so on. All in all, once your battery has been recharged 400 times, it typically loses 20% of its overall efficiency. And consecutive charging results in lower performance on the battery. A normal use achieves a total number of 400 cycles in approximately 2 to 3 years period.
2. Stay Away From Extreme Hot and Cold
Try not to expose your smartphone to extreme cold or extremely hot temperatures. This can severely wreck the delicate components in your cellphone, along with a massive strain on your battery and its performance.
3. Try To Avoid Using Fast Charging
Try not to use commercially available fast-chargers that are being sold out in the market today. If your latest smartphone comes packed with a fast charger by default, boxed along; then you may use that correctly. But do not cross-match as it severely impacts your battery life.
4. Do Not Let Your Battery Reach 0%
The latest Lithium-ion batteries that come packed in with your most recent smartphone are smart batteries. Unlike the old Nickle-Cadmium based ones that used to go in an older Nokia phone which had a “memory” of their own. If you do not let the phone die out and recharge it from 0% to 100% in those batteries; the performance would take a hit. Unlike those, the new Li-ion cells are intelligent batteries. These are designed to be kept performing irrespective of what their level is. But ideally, you should not let the battery drop to 0% and end up having a dead phone. You are best advised to charge your phone as soon as it reaches 50% and then removes the charging cord when it reaches 80%.
5. Turning Down the Screen Brightness
We all know our smartphones come along with an Auto-Brightness option. So why bother adjusting the brightness? You are wrong!
The brighter your screen is, the more battery it consumes. Even if you have got auto-brightness setup on your smartphone, you can still slide your brightness level all the way to a minimum. This has been proven to extend battery life and.
6. Decrease the Screen Time-out
No, you won’t lose on essential notifications and stuff if you set your auto-lock period on your smartphone to 30 seconds. This is the ideal timeframe that is suggested by the industrial experts to cut back on the batteries power consumption. So do that people!
7. Yes, delete that Facebook App
We all love Facebook. Yay Facebook!
But the bitter truth is, that with each upgrade; the resources it requires on the smartphone you own; are growing as well. Which reciprocally means, more battery consumption. Don’t believe me! Fire up your battery statistics and see for yourself. SHOCKED?
Get rid of that Facebook app if you are an iPhone user and resort to using Safari for your Facebook socialising. If you are an Android user, the Facebook app may come pre-installed, and you might not be able to delete it. In which case, you can just disable the app so it doesn’t hog upon the resources.
8. Resort to using Low Power Modes
Using low power modes that are well built-in into any new smartphones enables your phone to consume less CPU power and thus lets your battery breathe a little.
9. Buy the Apps That You Use Most Frequently To Get Rid Of Those Measly Ads
The ads that are run in the apps that you have just downloaded off of the AppStore or the PlayStore; hog up a lot of data. Which in return, eats a fair chunk of battery power. So if you are an avid user of a particular app, try to get hold of the paid version instead of using the free.
10. Push Notifications
Switch off the PUSH notifications on your smartphone. Push notifications tend to eat up a lot of battery power and are make and break when it comes down to power consumption and efficiency. If you are low on battery, I would strongly recommend you switch off the Push Notifications.
Related Questions
Here is a list of questions and FAQ’s that may answer any other questions you may have about the topic of “how to restore a smartphone battery”.
Does the Battery Doctor App Really Work?
The simple and the most straight forward answer to these questions is, “NO”.
These apps, in fact, do more harm to your smartphone rather than helping it, as they claim. These apps, in reality, clean the cache memory and close other apps on the phone that run in the background, which is quintessential for the performance of your smartphone. Once they do that, they keep on running in the background; causing unnecessary load and consume more battery than they are originally intended to do.
Does Deleting Facebook App Save Battery Life?
YES!
The real problem is not the Facebook app itself, but all warts that come along with the new upgraded app versions. It is all nice and fancy to have Facebook on your smartphone, but it shouldn’t come at the cost of having a depleted battery.
You can very well resort to using the web version of the Facebook app, which in reality offers the same features that your app normally would. Notifications, etc. and much more. And guess what, the web version of the Facebook app doesn’t consume a lot of battery either.
Can a Virus Drain Phone Battery?
This is explicitly applicable if you are an Android user. So the answer is plain “YES”. This can happen through you downloading an app from the PlayStore that had Malware in it. Or you exposed yourself to explicit material while browsing that allowed the Virus or the Malware to come directly into your smartphone, thus letting your battery run out quicker than usual. The best solution to this is to invest in a decent Anti-Virus and steer clear from visiting or downloading explicit content from the internet.
Should You Charge Your Phone to 100 Every Time?
According to a recent report on Battery University, you should not keep your phone to be charged overnight or let its battery levels drop below 20%. This is inherently harmful to the battery and would do more harm than good.
The best solution to this is to charge your phone at regular intervals, instead of letting it die out completely and then charge it overnight, or for more extended periods for it to reach 100%.
Does It Save Battery to Close Apps?
“NO!”
Closing the background apps (running apps) on your smartphone doesn’t necessarily educate to more battery life. In fact, it is the other way around. Once you force an app to close, you are utilising a specific resource from your battery charge to close the app and clear its RAM. This in return, forces more battery usage.
Do Open Tabs Drain Battery in the iPhone?
Short and sweet answer is “NO”.
Inactive tabs in your smartphone’s browser tabs aren’t harming your battery. Even if you have got a plethora of tabs running in the background, they are not going to have any impact on the battery. Unless you are streaming music or the tabs are actively running a video.
How to Fix a Phone Battery That Got Wet?
It entirely depends on what is the level of exposure your mobile battery had to water. If it was a replaceable battery and the battery hard been immersed in water for shorter periods, then keep the battery packed in a zip lock bag filled with dry white rice. Keep it for 2 – 3 days, and then try sliding it into your smartphone to see if its powers on.
But if the water exposure was for more extended periods, then just throw away the battery and get a new one. I know it is an environmental hazard to buy new batteries and throw away the old ones, but unfortunately as of now; the only way to power our smart gadgets is these pesky batteries. So no other way around to it to be honest!
Are Wireless Chargers Bad for Your Battery?
The answer is “NO!”
So just hop away and buy a certified branded wireless charging pad, i.e. Qi wireless charging stations and pads; are your best bet.
Does Fast Charging Damage Batteries?
Almost all the smartphones that are from the older generations have got something called the “regulator” installed in them. So it prevents your phone from overheating when you connect it to the fast charger. So the answer is straightforward “NO”, you won’t harm your cellphone batteries if you connect your new or old smartphone to it as the safety mechanisms present in the mobile prevent it from getting damaged.
Conclusion
To conclude this topic, your only way to preserve your battery life is “PREVENTION”. Follow the above tips and tricks that I have experienced and shared from my own personal trials; to its fullest. And you would be glad to know how your battery outperforms. Obviously, that is the whole reason for you ending up on this article from Google, isn’t it?
Happy Battery Preserving people!


